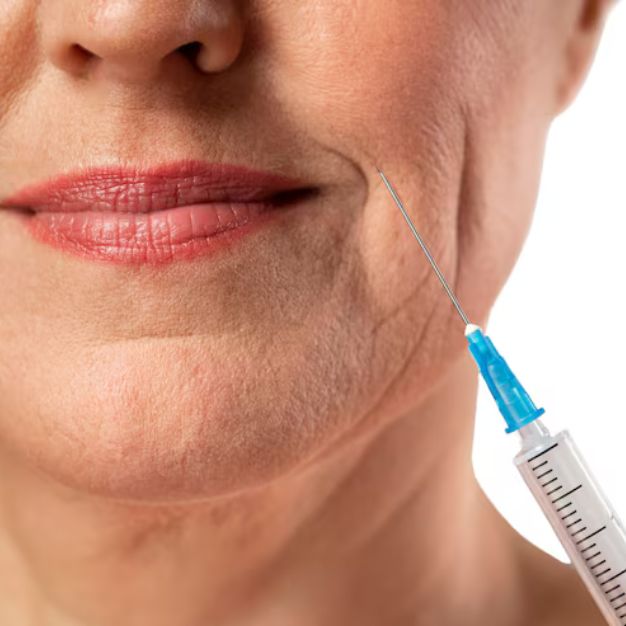
So you’ve just had your dermal filler treatment — congratulations! Whether it’s your first time or your fifth, that fresh, rejuvenated feeling walking out of the clinic is something special. But here’s the thing: what you do in the hours and days after your appointment matters just as much as the treatment itself.
Good dermal filler aftercare isn’t complicated, but it does require a little discipline. Skip the right steps and you could end up with more swelling than necessary, uneven settling, or results that don’t last as long as they should. Follow the right dermal filler aftercare advice, though, and you’ll be giving your filler the best possible chance to settle beautifully and last as long as possible.
This guide covers everything — from the first few hours post-treatment all the way through to your long-term maintenance routine. Whether you’ve had lip filler, cheek filler, jawline filler, or anything in between, this is the aftercare information you need.
Why Aftercare Matters So Much
Before we get into the specifics, it’s worth understanding why aftercare is so important.
When filler is injected into the skin, the surrounding tissue undergoes a mild trauma response. There will be some degree of swelling, and possibly bruising, as your body responds to the needle entry points and the new material being introduced. This is completely normal.
During the first 24–72 hours especially, the filler is still settling into position. It hasn’t fully integrated with the surrounding tissue yet. Anything that increases blood flow, heat, or pressure to the treated area during this window can affect how the filler sits, how much it swells, and ultimately how your results look once everything calms down.
Think of proper dermal filler aftercare as the final step in your treatment — not an optional extra, but an essential part of getting the outcome you’re after.
Immediate Dermal Filler Aftercare Instructions: The First 24 Hours
The first day after your treatment is the most critical window. Here’s what you need to do — and what you need to avoid.
What To Do
Keep the area cool
Applying a cold compress or ice pack wrapped in a clean cloth to the treated area can help minimise swelling and soothe any discomfort. Do this gently — don’t press down hard on the skin. Ten minutes on, ten minutes off is a good rhythm. Always keep a barrier between ice and skin to avoid ice burns.
Stay upright
For the first few hours after treatment, try to remain upright rather than lying down. This helps prevent excess fluid pooling in the treated areas and can reduce the degree of initial swelling.
Stay hydrated
Hyaluronic acid filler works by attracting and retaining water, so keeping yourself well hydrated helps the filler perform at its best. Drink plenty of water throughout the day.
Be gentle with your skin
If you need to touch the treated area — say, to apply a cold compress — do so with clean hands and a light touch. Avoid rubbing, pressing, or manipulating the filler in any way.
Take paracetamol if needed
If you experience discomfort after your treatment, paracetamol is generally considered safe. Avoid ibuprofen and aspirin unless prescribed, as these can thin the blood and increase bruising.
What To Avoid in the First 24 Hours
Makeup on treated areas
Wait at least 12–24 hours before applying makeup to the treated area. The injection sites are essentially tiny open wounds for the first few hours, and introducing bacteria through makeup brushes or products can increase the risk of infection.
Touching or massaging the area
Unless your practitioner has specifically told you to massage (which is sometimes recommended for certain treatments), keep your hands away from the treated areas. You don’t want to risk moving the filler while it’s still settling.
Alcohol
Alcohol thins the blood, increases inflammation, and causes dehydration — all of which can worsen swelling and bruising after filler. Avoid alcohol for at least 24 hours post-treatment, ideally 48 hours.
Strenuous exercise
Exercise raises your heart rate, increases blood flow, and elevates body temperature — all of which can exacerbate swelling and bruising and potentially affect how the filler settles. Give yourself at least 24–48 hours off from vigorous workouts.
Heat exposure
Saunas, steam rooms, hot baths, hot yoga, and similar heat exposures should be avoided for at least 24–48 hours. Heat dilates blood vessels and increases swelling. This includes hot showers — keep the water lukewarm.
Flying
The change in cabin pressure and recycled dry air during flights can exacerbate swelling and dehydration. If possible, avoid flying for at least 24–48 hours after treatment.
Blood-thinning supplements
Fish oil, vitamin E, garlic supplements, and similar blood thinners can increase bruising. Ideally these should be paused for a few days before and after treatment — but check with your practitioner first.
Days 2 to 7: Settling Phase Aftercare
Once you’ve made it through the first 24 hours, the most critical window has passed — but you’re not entirely out of the aftercare zone yet. The filler continues to settle and integrate with surrounding tissue for up to two weeks, so it pays to keep being mindful for at least the first week.
Continue Avoiding Intense Heat
Keep away from saunas, steam rooms, and very hot environments for the first week. Occasional gentle warmth (a warm shower, being in a warm room) is generally fine, but avoid prolonged or intense heat exposure.
Be Careful With Skincare Products
During the first week, keep your skincare routine simple. Avoid products containing:
- Retinol or retinoids — these can cause irritation and sensitivity in post-treatment skin
- AHAs and BHAs (like glycolic acid, salicylic acid) — exfoliating acids can irritate injection sites
- Vitamin C serums in high concentrations — wait until any redness or sensitivity has fully resolved
- Harsh physical exfoliants — scrubs and exfoliating cloths should be avoided on treated areas
Stick to gentle, hydrating products — a mild cleanser, a good moisturiser, and SPF. That’s all you need.
Sleeping Position
Try to sleep on your back with your head slightly elevated for the first few nights. This helps reduce fluid pooling and swelling. Sleeping face-down can put pressure on facial filler, and even side-sleeping can cause uneven pressure on the treated areas.
We know this is easier said than done if you’re a natural side or stomach sleeper — a travel pillow or extra pillows to prop yourself up can help you maintain the position through the night.
Avoid Dental Procedures
If you’ve had lip or lower face filler, try to avoid dental appointments for at least two weeks. The stretching and pressure involved in dental work can disrupt filler placement, and dental procedures also carry a risk of introducing bacteria near injection sites.
Keep Sun Exposure Minimal
The sun isn’t your friend during the healing phase. UV exposure can worsen post-treatment inflammation and redness, and over time, unprotected sun exposure breaks down filler more quickly. Keep the treated areas covered when outdoors, and apply a broad-spectrum SPF 30 or higher every day.
Dermal Lip Filler Aftercare: Special Considerations
Lips deserve their own section because they come with a few unique aftercare considerations — and lip filler is one of the most popular treatments going.
Swelling Is Normal — And More Noticeable Than You Expect
Lip swelling after filler is notoriously more pronounced than in other areas. This is because the lips have a rich blood supply and are highly vascular, meaning they respond to the needle more dramatically than, say, the cheeks. Don’t panic if your lips look quite swollen in the first 24–48 hours — this is completely normal and will subside significantly within a few days.
Most of the initial swelling resolves within the first 3–5 days, and any residual swelling usually settles by the two-week mark. Your lips at two weeks will be much closer to what your actual result will look like long term.
Avoid Pursing, Puckering, and Pressure
In the first 48 hours, try to keep lip movement to a minimum where possible. Avoid straws (the suction and puckering motion can affect lip filler placement), try not to excessively pucker or rub your lips together, and be mindful of anything that puts pressure on the lips.
Be Careful Eating
Stick to soft, easy-to-eat foods for the first day or two. Anything that requires excessive jaw movement, wide mouth opening, or direct pressure on the lips should be avoided while the area is swollen and sensitive. And steer clear of very spicy or salty foods, which can irritate the skin and worsen swelling.
Skip the Lip Balm (At First)
It sounds counterintuitive because your lips might feel a little dry, but avoid applying lip products — including lip balm — for the first 12–24 hours. After that, a gentle, fragrance-free balm is fine. Avoid anything with strong flavours, menthol, or active ingredients.
No Kissing
You might not feel much like kissing with swollen lips anyway, but for the first 24–48 hours, physical pressure and friction on the lips should be minimised. This applies to tight face masks too.
Dermal Lip Filler Aftercare for Bruising
Bruising around the lips after filler is common and can look quite alarming — dark patches around the lip border are not unusual. The good news is they typically resolve within 5–10 days. Arnica gel or cream (applied carefully around the area, not directly on injection sites) can help speed up bruising resolution. Colour-correcting concealers work well for covering bruising if you need to be somewhere during the healing period.
Dermal Filler Aftercare Advice for Specific Treatment Areas
While much of the general aftercare advice applies across all treatment areas, here are a few area-specific tips:
Cheeks
Cheek filler sits deeper in the tissue, which typically means less visible swelling — but it can still feel tender for a few days. Avoid sleeping on your side for the first few nights, and be mindful of anything that puts prolonged pressure on the cheeks (like wearing tight headwear, masks, or resting your face in your hands at a desk).
Nasolabial Folds and Marionette Lines
These areas around the mouth can swell enough to feel a little stiff or uncomfortable when talking or eating. Keep facial expressions relaxed and natural for the first day or two, and stick to soft foods.
Jawline
Jawline filler can feel quite firm and noticeable in the first couple of weeks. This is because the filler used in this area is typically denser and more robust. Avoid sleeping directly on your side on the jaw area, and again, dental appointments should be postponed for two weeks.
Under Eyes (Tear Troughs)
Tear trough filler deserves extra care. The under-eye area is one of the most delicate on the face, and swelling here can be more noticeable and longer-lasting. Sleep with your head elevated, avoid rubbing your eyes, and expect it to take a full two weeks before you get a true sense of the result. Be very gentle with eye makeup application and removal in this area.
Nose (Non-Surgical Rhinoplasty)
This area requires particular care. Do not wear glasses or sunglasses that rest on the nose for at least two weeks, as the pressure can reshape the filler. Avoid blowing your nose aggressively, and be careful with any face masks.
What’s Normal After Dermal Filler — And What’s Not
Knowing what to expect helps ease the anxiety that can come with a new treatment. Here’s a quick guide to what falls within the range of normal, and what warrants a call to your practitioner.
Normal Side Effects
- Swelling — varies from mild to moderate depending on the area; worst in the first 48 hours and gradually improves
- Redness — around injection sites; usually resolves within a few hours to a day
- Bruising — can range from minor to more significant; typically resolves within 5–14 days
- Tenderness — the treated area may feel sore to touch for a few days
- Lumps or bumps — small lumps immediately after treatment are very common and usually resolve as the filler settles; some areas (particularly lips) may feel uneven at first
- Asymmetry — immediately post-treatment, swelling can cause the results to look uneven; this usually evens out as swelling subsides
- Itching — mild itching around injection sites can occur and is generally nothing to worry about
When To Contact Your Practitioner
While the above are all considered normal, there are signs that warrant immediate contact with your practitioner:
- Skin that turns white or pale (blanching) in or around the treated area — this can indicate vascular occlusion (filler blocking a blood vessel) and requires immediate attention
- Severe or worsening pain beyond what you’d expect from bruising and tenderness
- Skin that looks mottled, bluish, or purple (a “lace-like” pattern called livedo) — again, can indicate vascular compromise
- Signs of infection — increasing redness, warmth, swelling, or discharge days after treatment rather than improving
- Fever
- Vision changes — a rare but serious complication that requires emergency medical attention immediately
Vascular complications are rare, but they can be serious. Any sign that something isn’t right should prompt you to contact your practitioner immediately rather than waiting to see if it resolves.
Long-Term Aftercare: Making Your Results Last
Good dermal filler aftercare isn’t just about the first week — there are things you can do in the months that follow to extend the life of your results and keep your skin in great condition.
Wear SPF every day. Sun exposure is one of the biggest factors in how quickly dermal fillers break down. A broad-spectrum SPF 30 or 50 applied daily protects not just your filler but your skin as a whole.
Stay hydrated. Hyaluronic acid works by attracting water — keeping yourself well hydrated supports the filler’s performance and keeps skin looking plump and healthy.
Maintain a consistent skincare routine. A good routine with gentle cleansing, a quality moisturiser, and targeted actives (once you’re past the healing phase) supports skin health and complements your filler results. Retinoids used consistently over time can stimulate collagen production and improve skin quality around the treated areas.
Avoid smoking. Smoking is one of the most damaging things for skin health — it breaks down collagen, impairs circulation, and can noticeably shorten the lifespan of filler results.
Book maintenance appointments. Rather than waiting until your filler has completely worn off, scheduling a top-up appointment as you start to notice results fading is often more cost-effective. Maintaining a baseline of filler over time means you typically need less product and get more consistent results. Your practitioner will advise you on the right timing for your specific treatment.
A Note for Aesthetic Practitioners
If you’re a practitioner sending clients home with aftercare guidance, the products you use make a real difference to how your clients’ results settle and last. Stocking high-quality, CE-approved fillers from reputable brands means your clients have the best foundation for a great result — aftercare can then work with the product rather than compensating for it.
At The Hada Filler, you’ll find a comprehensive range of professional-grade dermal fillers from trusted brands including Revolax, Kairax, Regenovue, and Lumifil, available at wholesale prices with fast UK shipping. The right product, placed by a skilled practitioner and supported by thorough aftercare guidance, is the formula for clients who are happy, loyal, and referring their friends.
For clients who want to extend and enhance their filler results with a complementary treatment, it’s also worth exploring skin boosters — hyaluronic acid-based injectable treatments that improve skin hydration and quality from within, giving an extra dimension to overall results.
Quick Reference: Dermal Filler Aftercare Instructions Summary
Here’s a handy cheat-sheet you can refer back to or share with clients:
First 24 Hours:
- Apply cold compress gently to reduce swelling
- Stay upright and keep head elevated
- Drink plenty of water
- Avoid makeup on treated areas for 12–24 hours
- No alcohol
- No strenuous exercise
- No heat (sauna, steam room, hot bath, hot yoga)
- No touching or massaging treated areas
- Take paracetamol if needed (not ibuprofen/aspirin)
Days 2–7:
- Continue avoiding intense heat
- Sleep on your back with head slightly elevated
- Keep skincare simple — avoid retinoids, acids, and harsh exfoliants
- No dental appointments if lip or lower face filler was used
- Apply SPF daily
- Avoid blood-thinning supplements
Lip Filler Specific:
- Avoid straws and excessive puckering for 48 hours
- Eat soft foods for 1–2 days
- No lip products for the first 12–24 hours
- Avoid kissing and direct pressure for 48 hours
- Expect swelling to peak at 24–48 hours and resolve over 5–7 days
- Arnica gel can help with bruising
Long Term:
- Wear SPF every day
- Stay hydrated
- Avoid smoking
- Maintain consistent skincare
- Book top-up appointments before results fully fade
Final Thoughts
Good dermal filler aftercare advice is something every patient deserves to receive — not a rushed verbal rundown at the end of an appointment, but clear, detailed guidance they can refer back to. When clients understand why they’re being told to do (or avoid) certain things, they’re far more likely to follow through.
Whether you’ve just had your first treatment or you’re a regular, following proper dermal filler aftercare instructions in the days and weeks after your appointment is genuinely one of the most impactful things you can do to protect your investment, maximise your results, and minimise any side effects.
Take the aftercare seriously, be patient while the filler settles, and trust the process. The results are absolutely worth it.